
CMake took me a bit of wrestling (especially on Xcode).
I wasn’t totally clear on a few high level concepts at first. Plus the ecosystem is full of jargon, naming disasters, legacy cruft…
However it’s a very useful tool to get up to speed on. You don’t need to be an expert, but it’s worth knowing the basics.
I’ll explain what I can here in hopes it’ll help future plugin devs.
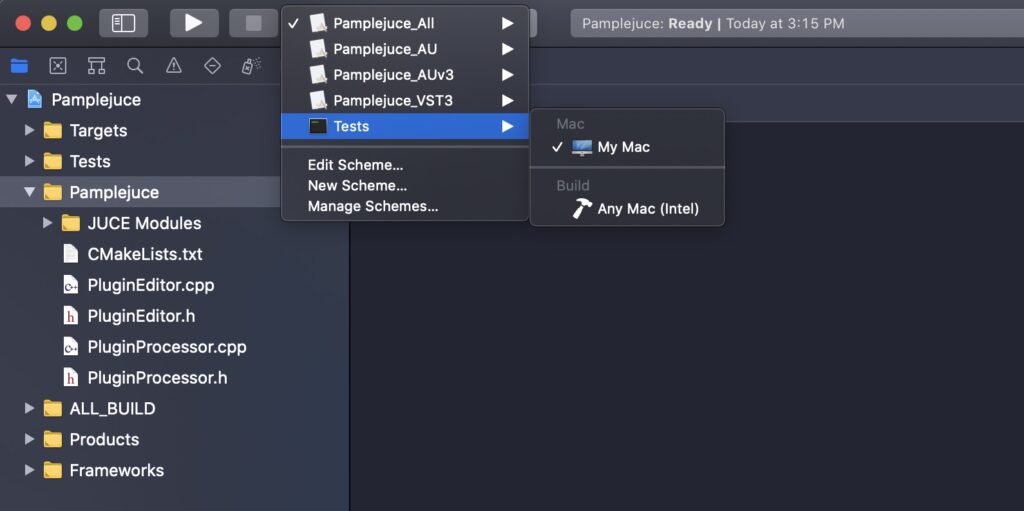
You can also out Pamplejuce, a GitHub template I made for JUCE + CMake + Catch2 + GitHub actions.
What role does CMake play?
CMake is the “glue” that lets you configure and build your JUCE project for multiple platforms.
Before the CMake integration was announced the only way to do this was via JUCE’s custom app, the Projucer.
So one main thing CMake does is exports “build tool files.”
That means it spits out .xcodeproj files and Windows .vcxproj files that your IDE can open.
It also configures and builds executables. This makes it really useful for running on the command line in CI environments.
All of these things are configured by a CMakeLists.txt file that sits in the root directory.
You might also see CMakeList.txt files in sub directories and oh boy then things start to get really complicated.
The coupling can be concerning…
So, CMake seems to do a lot of different jobs.
Unfortunately, these discrete jobs are not separated in CMake’s config. Instead, it’s all mashed together in one big happy festival of configuration directives.
The CLI commands you’ll issue on the command line are also all mashed together in one tool. You’ll just have to get used to what flags you should be passing, it’s not too tough!
In my opinion, this is the reason CMake has the (deserved) reputation for being “hard”: a lot of complexity results from all the implicit coupling between these different concerns.
CMake also builds on an long historical foundation of Makefiles, etc. The documentation often assumes you know the basics (what “configuration” means, what a “target” is, etc.)
Some Jargon
Ok, so let’s define a few things you’ll need to know.
A Library is a chunk of code. It’s probably in a subdirectory. It could be a JUCE module or some cool library you found on GitHub. Or a testing library like Google Test or Catch2.
A Target is an executable or library that gets configured and compiled. These can be configured and built discretely. They might have dependencies on each other. You might have your app target and then a test target. If you have a plugin, each plugin version (AU, VST3) is actually its own target. Your IDE might let you setup build configurations for each target.
The Toolchain is your complier, debugger, and so on.
You can switch between different Build Types when compiling, like Debug which includes extra debugging information and disables optimizations since they take a longer time to compile, Release which enables optimizations or RelWithDebInfo which is the best of both worlds.
Modern CMake loosely refers to CMake being not quite as shitty to work with any more (vs. pre 3.0).
So, for example the CMake command target_link_libraries will link a library (such as a testing framework like Catch2) to your plugin target.
JUCE’s CMake API
JUCE provides helper functions such as juce_add_plugin.
These helpers abstract away a lot of framework’s build configuration needs and lets you write JUCE config in the CMakeLists.txt.
For a vanilla JUCE project, for example, you won’t see a lot of add_executable or add_library calls in the CMakeLists.txt, JUCE automagically configures the targets behind the scenes.
So basically, it sets up our project much like the Projucer does, but with a lot more flexibility.
Examples of how to use JUCE’s helpers can be found in their examples directory.
It Configures
What is “configuring”?
It’s when the CMakeLists.txt is parsed, processed and CMake spits out the whole laundry list of things it needs to build the project.
So you can think of configuring as the prep work a kitchen will do before cooking.
On the command line, it looks something like this:
cmake -B BuildsThe -B option tells CMake what folder to perform the build in — where it’s going to barf all the configuration files (if you use git, you’ll want to add this folder to your .gitignore.
When configuring, you can specify the build type. By default it is Debug. For Release you can specify it like so:
cmake -B Builds -DCMAKE_BUILD_TYPE=Release Some IDEs such as CLion will automatically detect and run the configure step, using standardized build folder names such as cmake-build-debug and cmake-build-release and so on.
It Generates
If you pass -G, CMake outputs project files for system specific build tooling and IDEs. The idea is you generate a project file and then your IDE can open it and you can press build there.
On windows, this will create a solution file such as MyProject.vcxproj
cmake -B Builds -G "Visual Studio 17 2022"On MacOS this will build you an Xcode project such as myProject.xcodeproj
cmake -B Builds -G XcodeVisual Studio and CLion both have built-in CMake support which keeps you off the command line. You won’t actually need to generate anything or run cmake on the command line. Just open the folder with the code in it…
It Builds
One can compile the executable directly with the configured tool chain by passing --build.
cmake --build Builds --config ReleaseThis is how you will build in Continuous Integration or on Linux.
Locally, you’ll probably just use your IDE to build unless you prefer the terminal for some reason.
It tests
CTest is a unit test runner that comes with CMake.
It doesn’t know anything about your unit test implementation (Catch2 or GoogleTest, etc). It doesn’t know anything about the executable that it will run.
If you want to run tests with JUCE, a test executable has to be created. See the Catch2 CMake integration for details or check out the example in Pamplejuce. You don’t have to use CTest to run tests. You can just build and run the test binary instead.
It installs things
(But I’m not using this functionality for JUCE, so I’ll casually ignore this for the time being).
JUCE and CMake Tips & Troubleshooting
Order Matters
Watch out for how things are specified in the config.
For example, a target has to have be added before you can target_link_libraries.
Likewise, juce_add_module should be called before juce_add_plugin.
When in doubt, blow away the build folder
CMake is very much a “turn it on and off again” piece of software.
Don’t bother debugging something esoteric and scary looking before you try and rm -rf Build (or whatever your build folder is).
The layers of caching involved make it just a matter of time before your IDE, a dependency, or a CMake update causes an issue somewhere.
On MacOS? Avoid the brew version of CMake
I’ve gotten reports of problems with the brew install cmake version of CMake not being able to find the C++ compiler.
So if you are using Xcode, download the official pre-compiled binaries instead.
Use VS / CLion? Forget the command line!
Visual Studio and CLion both have built-in CMake support which will keep you off the command line.
The IDE’s will auto-run CMake when relevant things change like the CMakeLists.txt.
Use the Ninja Generator
You can speed up the whole process by using Ninja as your generator. This is the default in CLion.
It may sound counterintuitive to add yet another layer to this already complex process, however it’s largely transparent and it’s worth it! It has way better defaults, like taking advantage of all of your processor cores while configuring, etc.
brew install ninja on MacOS. On Windows, download the latest exe and make sure it’s in your path.
PUBLIC, PRIVATE, INTERFACE?
There are 3 types of keywords for CMake’s target_link_libraries and target_include_directories and friends.
This can be… confusing at first. But the main thing to remember is that these keywords control visibility.
PUBLIC: can be used by the current target and any other target that depends on this one.
PRIVATE: can be used only by the current target
INTERFACE: will not be used by the current target, but can be used by anything that depends on the current target
Don’t include(CTest)
include(CTest) adds a ton of unnecessary targets.
I recommend using enable_testing() if you don’t want to be spammed.
Glob Glob Glob?
CMake historically and famously recommends not using globs. (Globs are just the * character. For example ~Documents/* would be all files in your user Documents folder.)
As a hard rule, “no globs” would mean that you explicitly and manually list out every file you want in your project. You’ll be editing CMakeLists.txt and re-configuring and exporting every time you add or rename a file.
This adds some friction to project file management and can be unwieldily and unpleasant.
Personally, I think it makes for a terrible-bordering-on-hostile 1990s developer experience to have to handhold your build system with something as simple as “what files are available.”
In most cases, with you can now happily ignore this advice and use CONFIGURE_DEPENDS. This will tell CMake to check the glob and rebuild if necessary.
file(GLOB_RECURSE SourceFiles CONFIGURE_DEPENDS "${CMAKE_CURRENT_SOURCE_DIR}/Source/*.cpp" "${CMAKE_CURRENT_SOURCE_DIR}/Source/*.h")
target_sources("${PROJECT_NAME}" PRIVATE ${SourceFiles})
You might be cautioned by old timers, but I’ve yet to see or even hear of this actually being a problem in 2024. Update: I’ve been bitten once, but it’s in an obscure place in JUCE proper.
CMAKE_CURRENT_LIST_DIR and friends
One of the things CMake itself is absolutely terrible at is naming things.
My assumption is that the devs prioritize backwards compatibility at all costs (namely: usability, new user onboarding, feeling sane in any way whatsoever).
There are trivial examples everywhere, such as all macOS stuff being named OSX (Hello, 2016).
This can really bite you once you get rolling with CMake and start juggling different CMakeLists.txt in subdirectories, modules, etc.
So beware: CMAKE_CURRENT_LIST_DIR isn’t actually “the directory containing the current CMakeLists.txt file”. If you are in an included .cmake file, it’s actually the directory of that included file.
CMAKE_CURRENT_SOURCE_DIR is actually the directory of the current CMakeLists.txt.
And CMAKE_SOURCE_DIR is the directory containing the top level CMakeLists.txt!
Using all your cores
If you are using Ninja, this is automatic and you can skip the following!
The configure step on a JUCE build is kinda sluggish. JUCE uses that opportunity to secretly compile a few things the project build will actually need.
If you are using an IDE that manages CMake, it likely manages making sure CMake is fast.
But in CI or on the command line, you’ll probably want to set 2 things to ensure speedy builds:
First, ensure juceaide is compiled quickly on a JUCE project by setting CMAKE_BUILD_PARALLEL_LEVEL, for example, exporting it to your environment
export CMAKE_BUILD_PARALLEL_LEVEL=3 # Use up to 3 cpus Secondly, pass -j4 or --parallel 4 to cmake --build to specify the number of parallel build jobs (in this case 4).
Check out some example JUCE CMake configurations
Here are some examples to look through:
- Pamplejuce, my JUCE/CMake/Catch2/GitHub Actions plugin template
- Eyal’s CMake prototypes
- Max Pollack’s template repo
- Jatin Chowdhury’s Analog Tape Machines
Leave a Reply