Trash those overpriced third-party OV and EV certs! Set that clumsy dongle on fire! Sign on the line for $9.99/month. Code signing apps and plugins on Windows in 2025 is finally (more) sane and (same as Apple) cheap.
As of April 2026, Artifact Signing is in General Availability (GA) but is restricted to US, Canadian, EU or UK businesses. You can now apply as a self-employed individual and you no longer need the 3 years of history that were required when the service was in public preview.
This article walks you through how I set things up. You should visit Microsoft’s official docs where they do something similar. Also check out Koala DSP’s guide.
Why is code signing needed on Windows?
Installers throw up an evil blue SmartScreen warnings on Windows by default. This frightens users and makes them think there’s a virus.
Installation is the person’s first experience with your product. Adding friction at the start of that experience sucks. Especially for less technical users.
That’s a good enough reason for any paid product, in my opinion!
Love pain? Check out my other detailed posts on Windows code signing with third party certs, or code singing and notarization on macOS here.
How Azure Artifact Signing works
I’ve been in the Artifact Signing private preview since late 2023. I’ve spent an hour chatting to the (very nice!) team one-on-one and have participated in a couple meetings. Here’s the scoop:
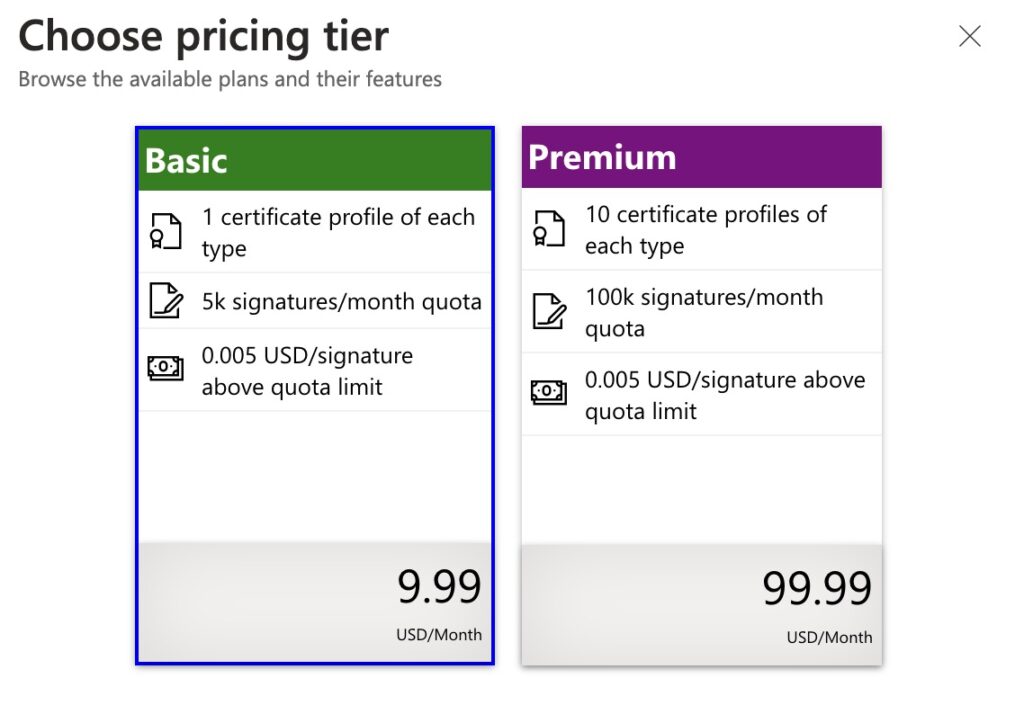
Instead of buying an overpriced signing certificate from a third party, you’ll pay $9.99 a month for a signing account. When you make a new installer, you’ll use tools such signtool or the official GitHub Action to sign the installer.
Instead of lasting years, certs are now an implementation detail and (generated daily with a lifespan of 3 days). That allows for time-precise revocation if there’s any need.
Azure Artifact Signing is better than legacy OV/EV certificates. It’s a different paradigm. Unlike certificates, you always get instant reputation on all executables signed — that reputation is tied to your identity, no longer teh particular cert.
Artifact Signing has been used internally for all of Microsoft’s products and close partners for years now. This isn’t a “new” service. See this link for detailed compatibility info.
Getting started: Create an Azure account
Do it here.
Step 2: Create a Subscription
According to a commenter, new Azure accounts now come with a Subscription record setup, but you’ll have to update it to “pay-as-you-go.”
In Azure, you add paid services through creating a “Subscription” record.
This is sort of a clunky and pointless bureaucratic thing, but hey, it’s a pre-req to setting up a code signing account. There’s no extra charge for setting up a “subscription.”
Step 3: Create a “Artifact Signing Account”
Easiest just to stick signing in the search bar than to wade through hundreds of crazy service names.
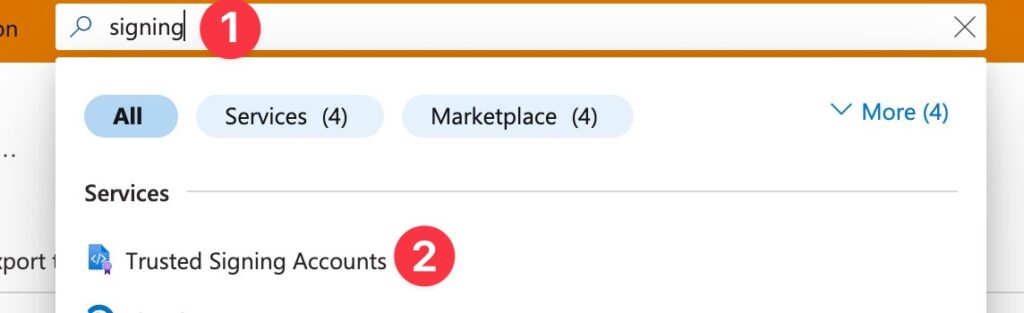
Select the subscription you just created, pick an arbitrary name and select a region:
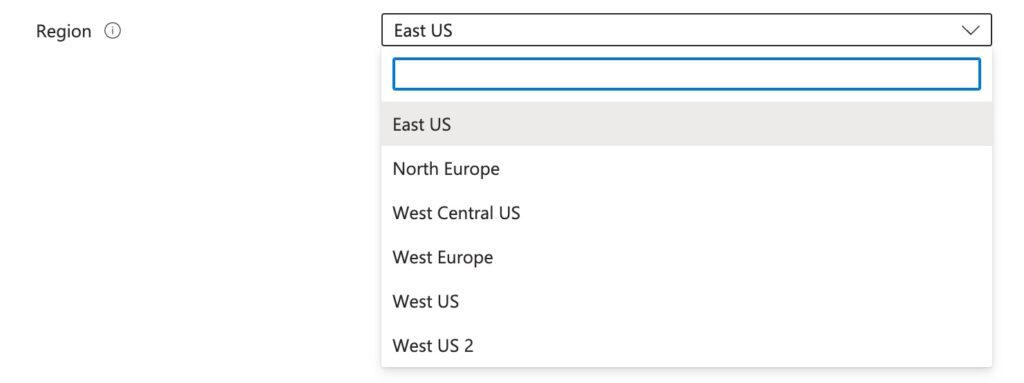
You’ll need to specify the region’s endpoint when signing. You’ll see the url on the main Artifact Signing account page after creation. You’ll need this URL later.
Step 4: Create “App Registration” user credentials
This step creates API credentials for an arbitrary “App Application” to use outside of Azure. In other words, this is how Azure will know it’s you when you go to sign your installers.
Search for App Registrations and create a new one.
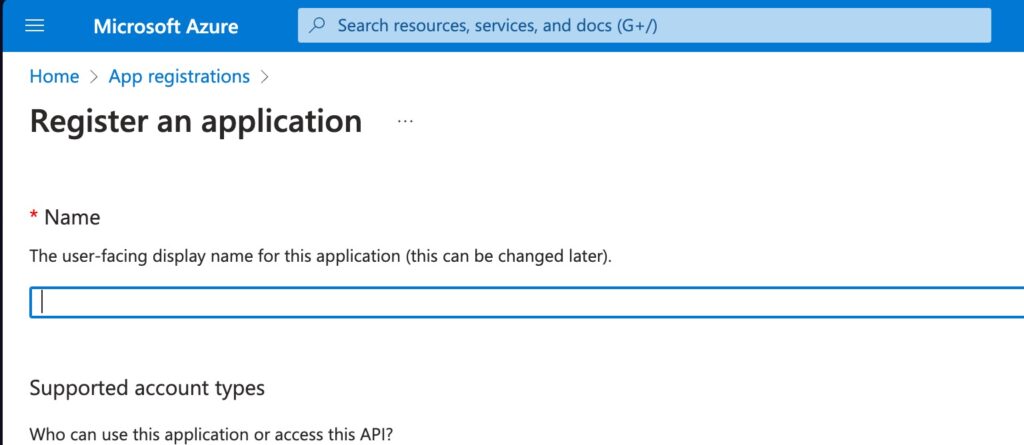
Give it a name and keep the defaults. I called it trusted-signing here, but that’s arbitrary.
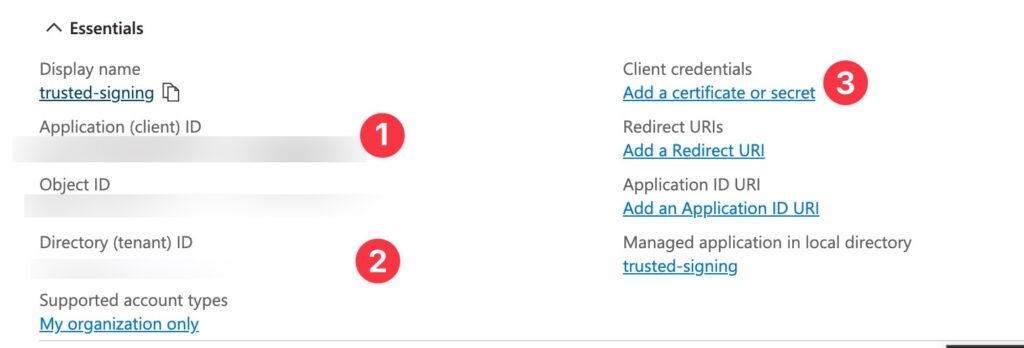
Note the client ID (1) and the tenant ID (2) for later signing. Locally you will later set these as environment variables AZURE_CLIENT_ID and AZURE_TENANT_ID.
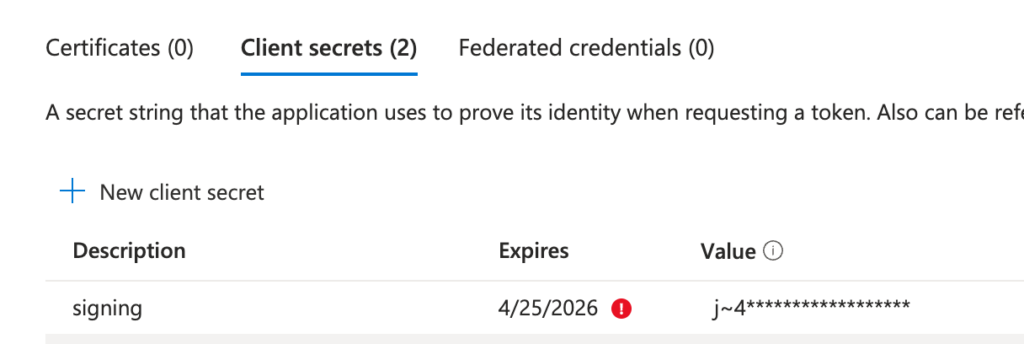
Then add a secret (3), setting the expiry date to 24 months.
Also note the secret value of the created secret. You’ll set this as AZURE_CLIENT_SECRET.
Step 5: Add “identity verifier” role to your Azure account
You’ll go through this role wizard twice, once for your Azure user (to add the identity verifier role) and once for that “App Registration” user (to add the signing role).
First, setup the Artifact Signing Identity Verifier. This is so your Azure account has permission to go through identity validation. This feels a bit silly and redundant for an indie dev — we’re clearly the admin already on our Azure account? But it’s necessary.
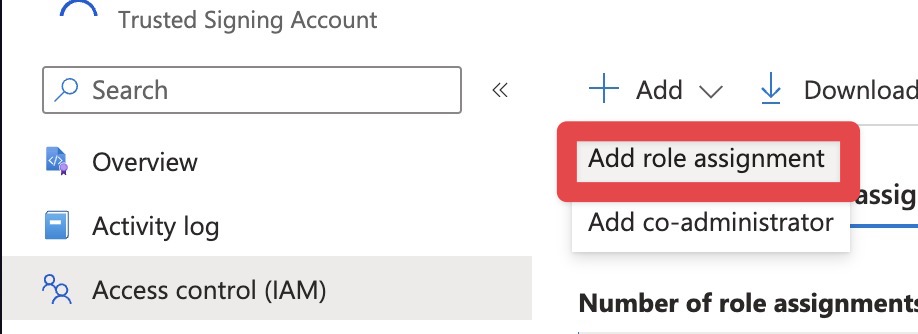
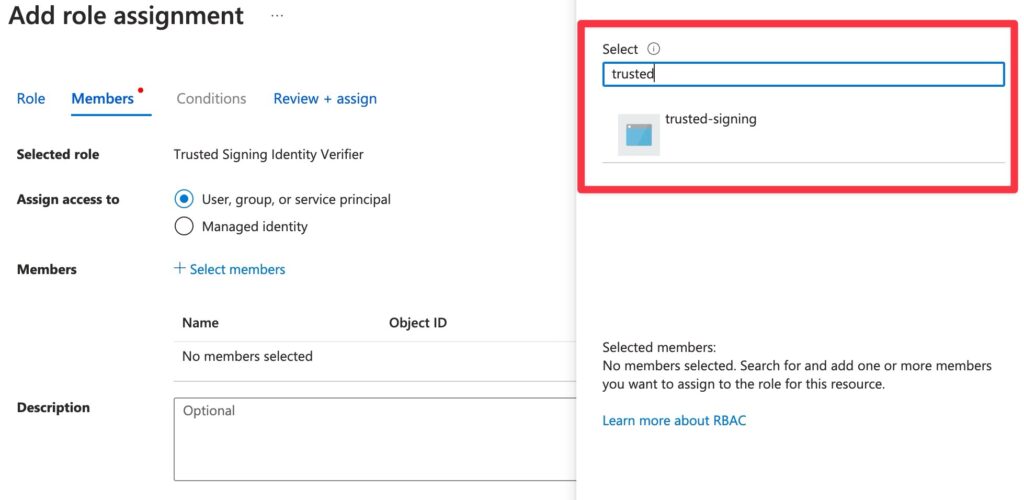
In the Artifact Signing Account, click Access Control (IAM) and then Add role assignment.
Search for “trusted” to bring up the role:
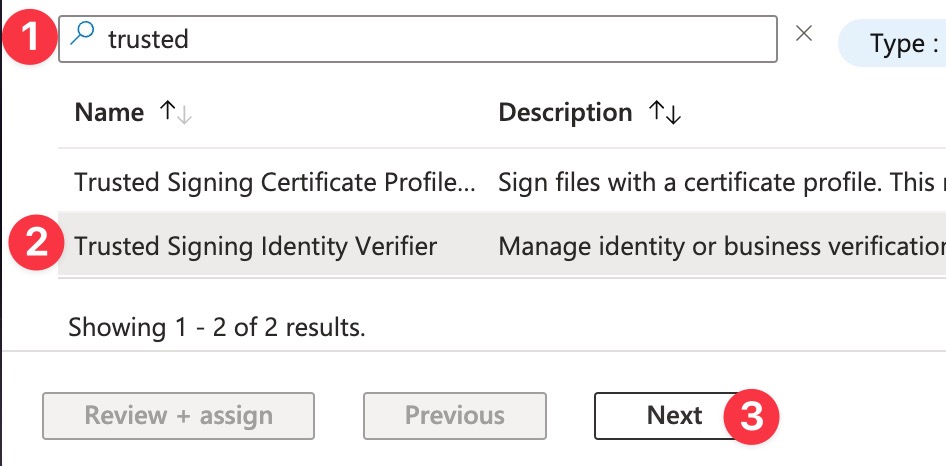
Select the Artifact Signing Identity Verifier role and then click through the wizard to add it to your main Azure user.
Step 5b: Add the signer role to your “App Registration” user
Next, you’ll start the wizard again. You want to add a role assignment for Artifact Signing Certificate Profile Signer. This is a role that we’re adding to the App Registration user that you created in Step 4. This lets us actually do the signing from the API.
First, do a funny dance of searching for the App Registration user you setup by name. In my case, the App Registration name from Step 4 was trusted-signing. So I typed in trusted to bring up the user:
Don’t make my mistake of assigning the role to your main Azure user — double check you are assigning the role to the “App Registration” user you created in Step 4.
To double check you did it right, go to IAM > Role Assignments and double check the two roles are there:
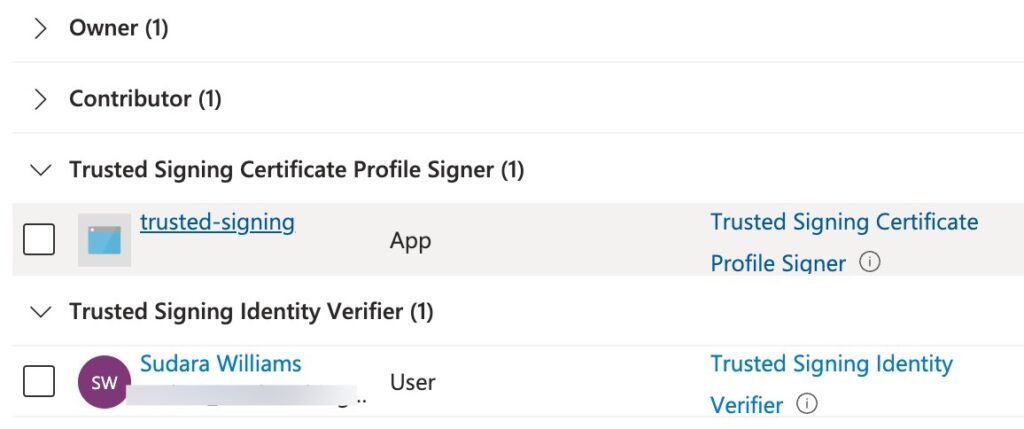
trusted-signing is just my poorly named “App Registration” user created in the previous step!Step 6: Identity Validation
Compared to the old, crusty, third-party identity validations that can take weeks, require phone calls and physical letters, Microsoft’s identity validation is fairly chill.
Microsoft uses an in-house, worldwide identity validation service. They claim they can validate in as little as an hour. This was true for several commenters below as well as a few friends, including one where it took 10 minutes.
For me (in the EU, submitted on a Saturday) it took ~12 hours to get the initial request for additional documents, another ~2 days to get back to me, and then things stalled out a bit because of a misunderstanding (more on this later) taking 10 days in total.
2026 Update: It looks like Microsoft now uses a third-party validator, which ironically has a phishing-sounding domain: au10tix. Jesus. The upside is that maybe there’s some more automated consistency, the downside is you have to send your documents to this sketchy third-party with who knows what data retention policy and are basically required to use the “Microsoft Authenticator” app to assert this identity validation.
Let’s get started. You’ll want to select New Identity > Public
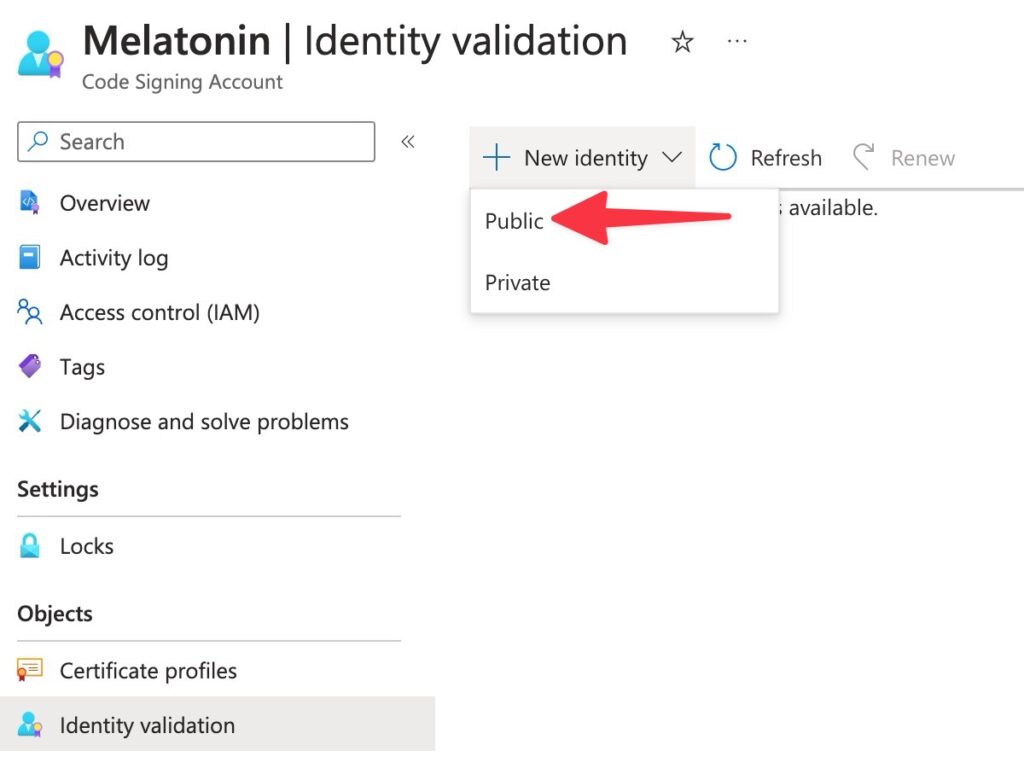
Private means “use a certificate chained to an opt-in trust root that your app users have to manually install” — so, yes, you want Public!Now fill out the form. Use a DUNS Number if you are a US biz and have one. Otherwise a Tax ID, for example if you are in the EU with a business (like I am).
You might be required to provide proof of ownership of the domain you are submitting as your Primary Email (if it’s not an @gmail.com).
Azure form validation sucks. It took me a few tries before pressing Create was possible. Some fields seemed to want numbers only, otherwise it would say things like “This is not a valid tax id.”
When I finally could press Create, I got hit with this great popup, despite having valid primary and secondary email addresses:
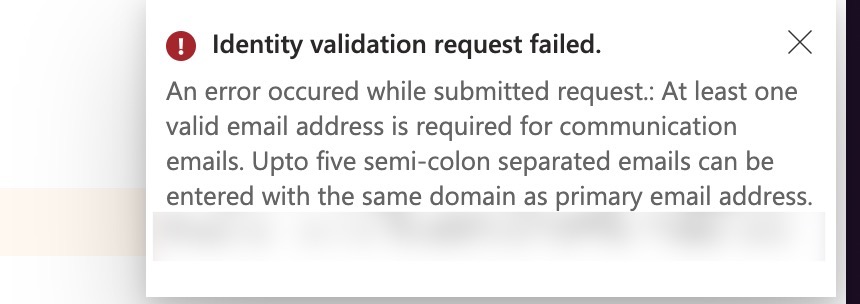
The problem was (randomly) that the secondary email address has to be on the same domain as the primary!
Providing identity documents
After submitting identity validation, you’ll get an email with the subject Action required: Complete your Artifact Signing identity validation.
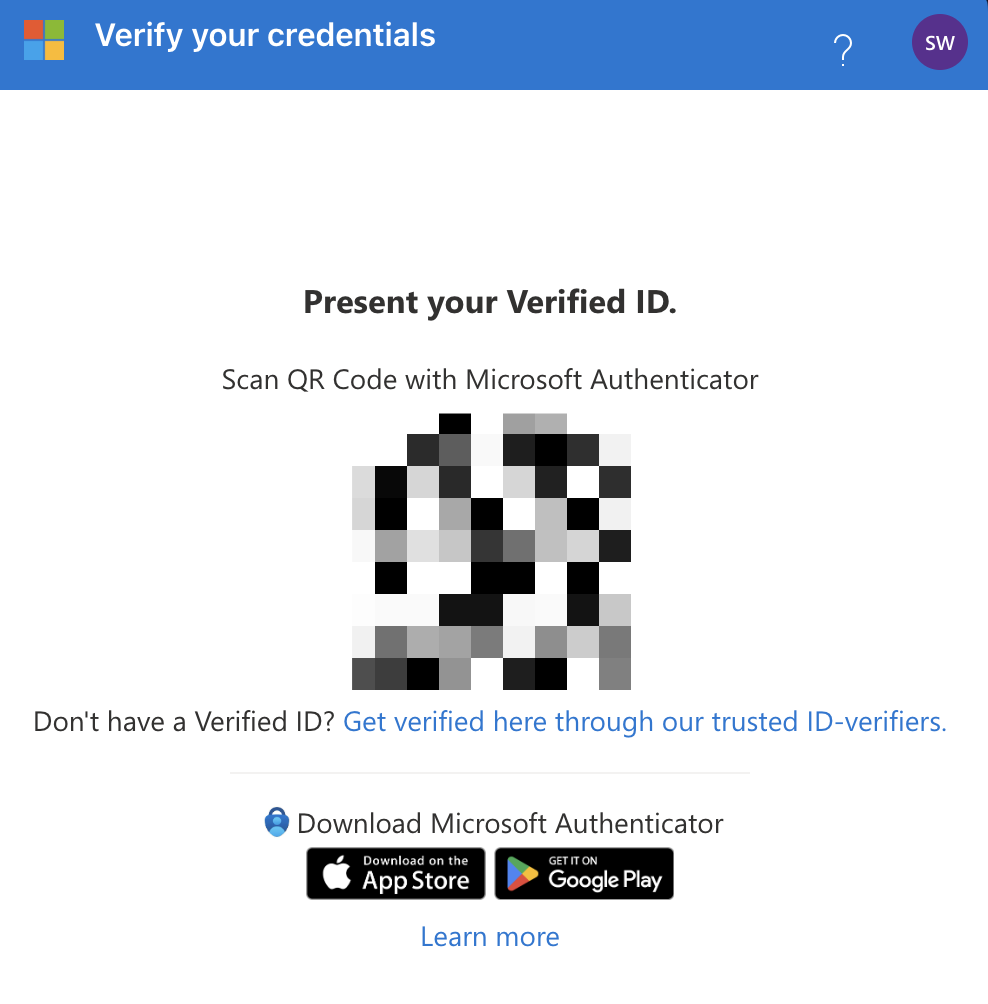
When you click through that email, it looks like some sort of dead end, referencing “Microsoft Authenticator” (on the domain credentials.microsoft.com). Yeah, so you will need to click “Get verified here” which will take you to the third party site.
Oh and you will be basically required to download the Authenticator app on the App Store. Just to store this identity you’ll use once every 2 years. Sorry.
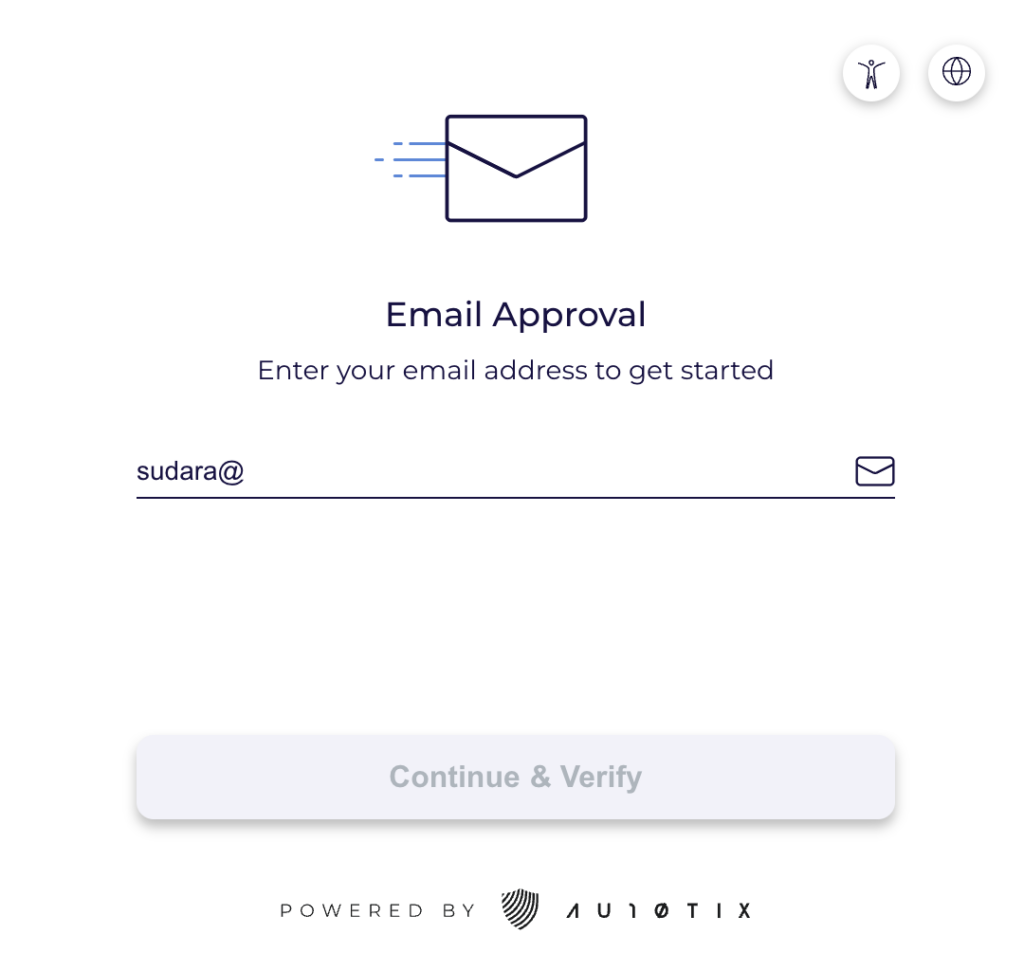
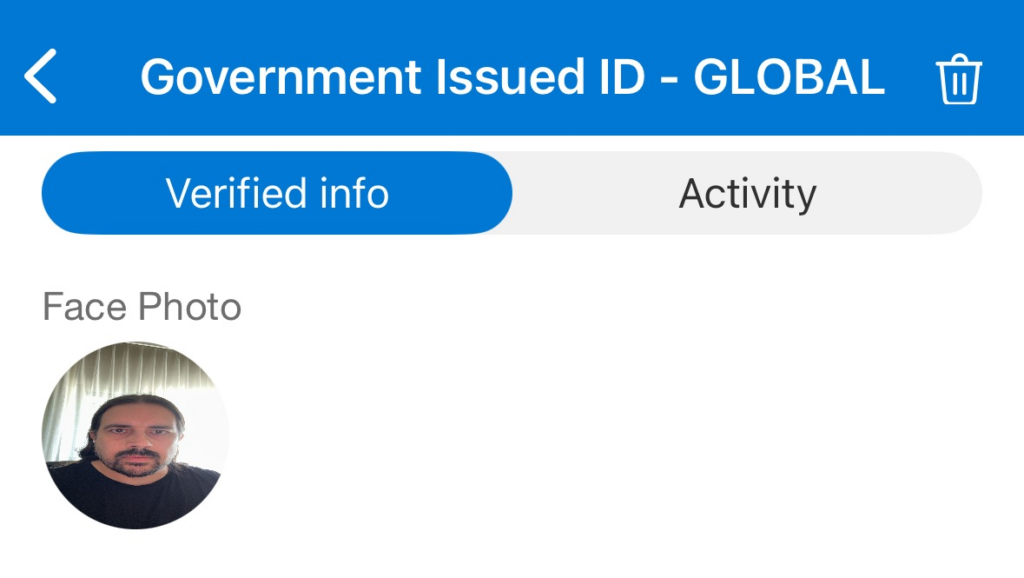
Follow the wizard for the again, very phishing-sounding company AU10TIX, giving them some government issued ID and taking a selfie and praying to data-breaching Jesus that they have advance access to Claude Mythos or something.
This is what success looks like, a profile photo with skewed proportions:
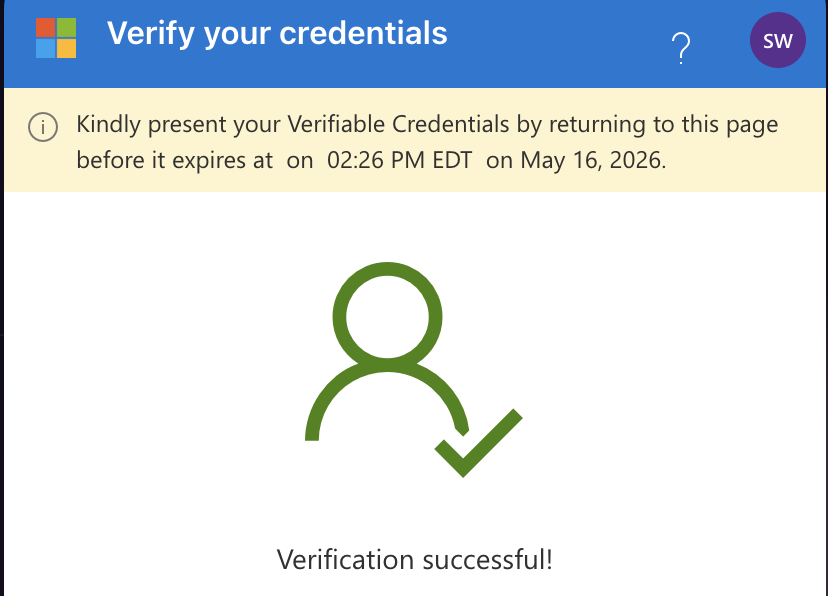
Ok, so assuming you have things setup correctly, go BACK to the Microsoft email that had a QR code and scan it with Microsoft Authenticator:
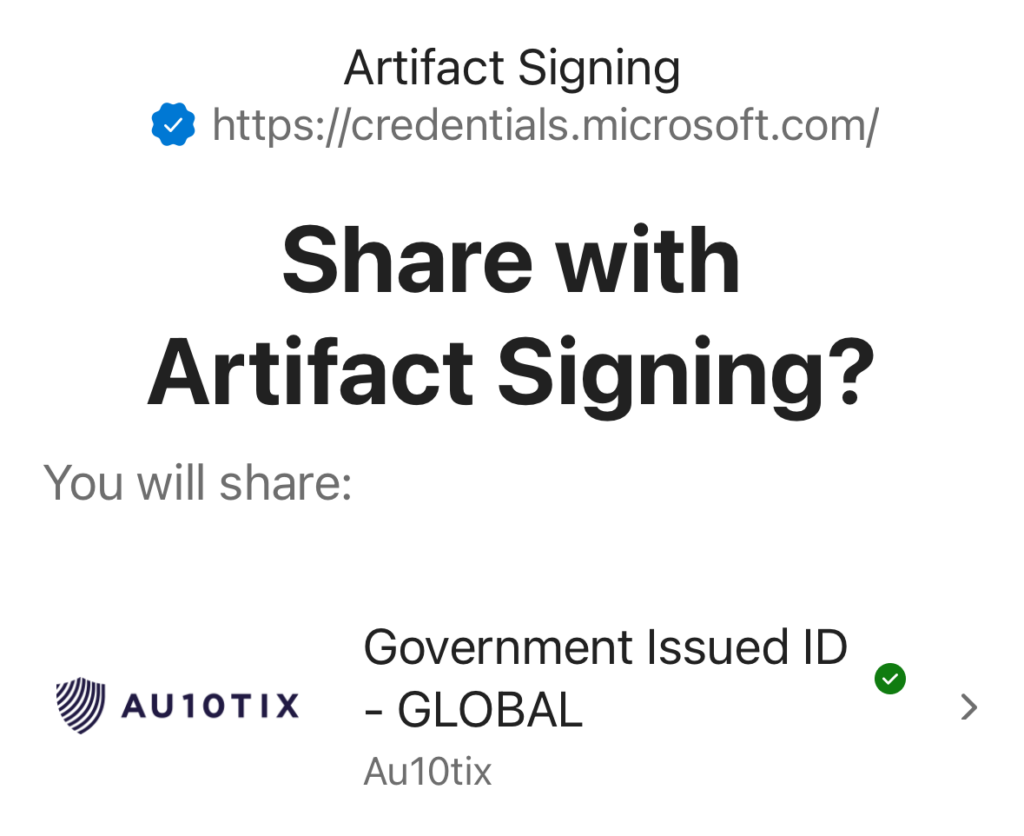
And finally, you should see some oversized 2001-era success icon:
If you end up waiting for more than a day or two after submitting documents, re-submit identity validation with a different number, for example the EIN (EU tax ID) document instead of a DUNS (this has worked better for people in the EU). Also, make sure your company name is aligned everywhere you are entering it as well as on your documents. When in doubt, re-submit a new request! Treat it like the API it is.
Let me know in the comments how long it took for your identity validation, would be nice to know if I’m an outlier.
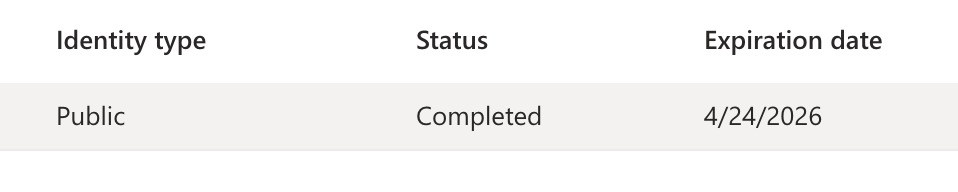
Interestingly, the identity validation record expires 2 years after the request was made, better put that on your calendar.
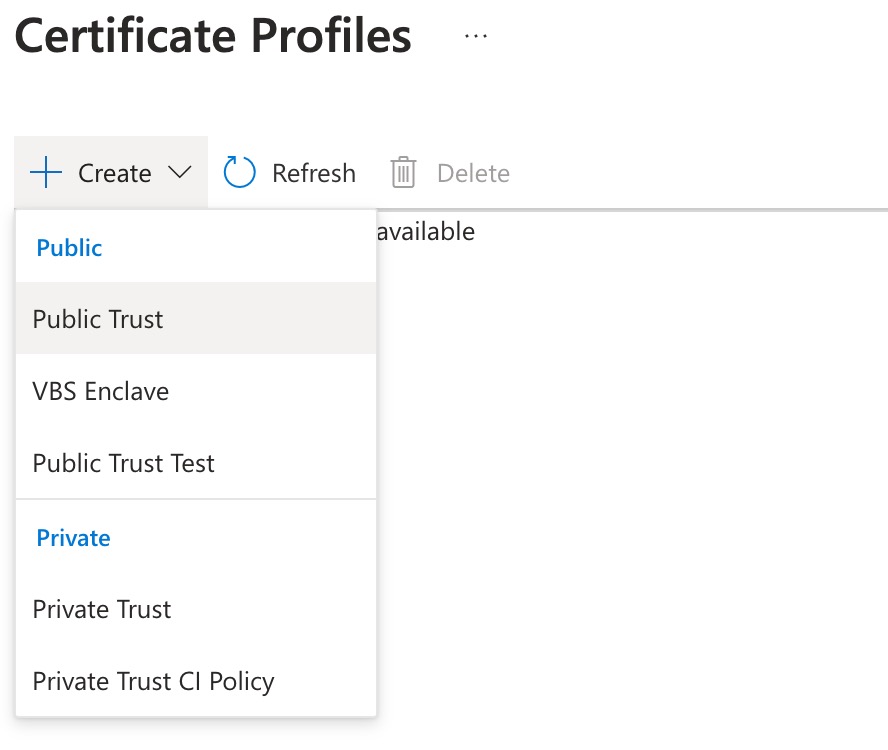
Step 7: Create a Certificate Profile
The actual certs on Azure Artifact Signing are created and rotated daily. But you’ll need to create a “profile” to access and sign with them. Create a Public Trust profile:
Pick a name.
You’ll need this name later when signing…
Under Verified CN and O select your verified identity (from the last step).
Step 8: Signing locally
In my day to day, I only create signed builds via CI (I prefer to keep that boundary hygienic, helps with debugging, etc).
To get going locally, do the following steps:
Export credentials so signtool can “see” Azure
The easiest way is to export AZURE_CLIENT_ID, AZURE_CLIENT_SECRET and AZURE_TENANT_ID as environment variables to get started. For each, run the following with your values (no spaces around the equal sign):
set AZURE_CLIENT_ID=haoteuhantehusigntool credentials give priority to the azure environment variables for “service principles” (aka your App Registration user, why so much jargon…), but there are many methods including ManagedIdentity. You can also use az login. I recommend just setting AZURE_CLIENT_ID, AZURE_CLIENT_SECRET and AZURE_TENANT_ID as environment variables so that Things Just Work.
Create a metadata.json
You’ll need to warm up your code editor and craft 3 pieces of information in json format.
The url for the region you selected will be your Endpoint. You can find this labelled Account URI on the main Artifact Signing Account page in Azure. For me, in the EU, it’s https://weu.codesigning.azure.net/
While you are there, note the name of your artifact signing account. That will be your CodeSigningAccountName.
Lastly, you’ll need the CertificateProfileName from step 7.
{
  "Endpoint": "https://wus2.codesigning.azure.net/",
  "CodeSigningAccountName": "ValhallaSigning",
  "CertificateProfileName": "ValhallaTrustUs"
}
Cast a spell and finally call signtool
Now you need to make out your own version of the following command, replacing the /dlib (path to the dlib location) and /dmdf (path to your handcrafted json file). All other arguments should be identical to this:
signtool.exe sign /v /debug /fd SHA256 /tr "http://timestamp.acs.microsoft.com" /td SHA256 /dlib "C:\Users\you\path\to\the\Azure.CodeSigning.Dlib.dll" /dmdf "C:\Users\you\Desktop\metadata.json" filetobesigned.exeI don’t have much to add, except:
- You aren’t crazy — yes, you need to download a dlib and pass its downloaded location as a command line argument to
signtool. Not awkward at all. If you don’t want to use nuget to grab the dlib, you can click “Download Package” in the sidebar, rename the downloaded file to a.zipand bob’s your uncle. - You do need at least the .NET 6.0 runtime installed. Double check what runtime you have with
dotnet --list-runtimes. - Make sure that endpoint url is right, I fucked that up at first…
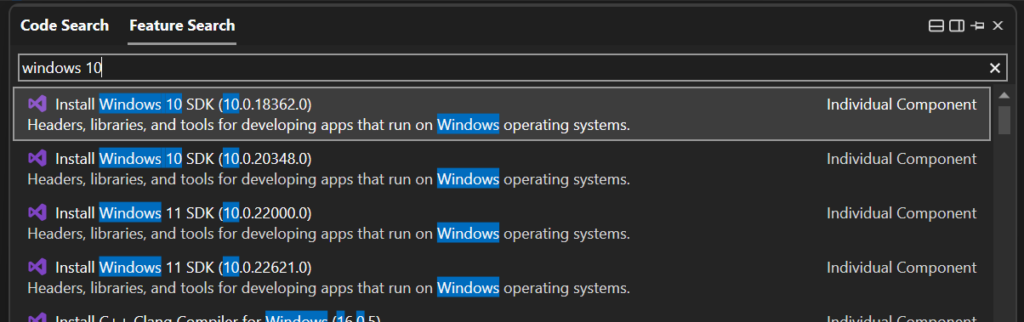
- You’ll need at least version
10.0.2261.755ofsigntoolitself. If you need a new version locally, you can download it from within Visual Studio’sFeature Searchand it’ll show up inC:\Program Files (x86)\Windows Kits\10\bin.
You can also crib Koala DSP’s guide and/or follow Microsoft’s docs about how to get started with signtool.exe.
Step 9: Artifact Signing in CI (GitHub)
Azure publishes a Artifact signing action for GitHub Actions which basically scripts inputs to the Powershell integration.
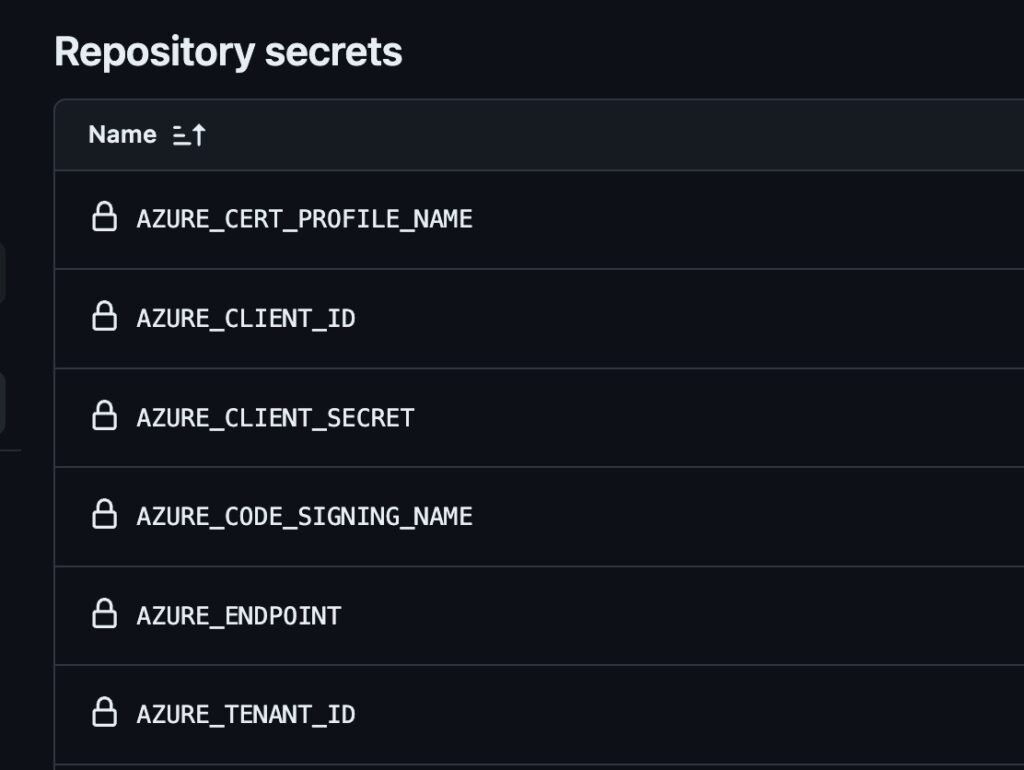
You’ll need 6 pieces of information that we’ll add as GitHub secrets.
The first 3 are the application client info (as in local signing): AZURE_TENANT_ID, AZURE_CLIENT_ID and AZURE_CLIENT_SECRET.
In addition you’ll need the AZURE_ENDPOINT — this the url for the region you selected. You can find this labelled Account URI on the main Artifact Signing Account page in Azure. For me, in the EU, it’s https://weu.codesigning.azure.net/
While you are there, note the name of your artifact signing account. You’ll store that as a secret called AZURE_CODE_SIGNING_NAME.
Lastly, you’ll need the AZURE_CERT_PROFILE_NAME from step 7.
The entire action will look something like this:
- name: Azure Artifact Signing
  uses: aazure/artifact-signing-action@v1
  with:
    endpoint: ${{ secrets.AZURE_ENDPOINT }}
    signing-account-name: ${{ secrets.AZURE_CODE_SIGNING_NAME }}
    certificate-profile-name: ${{ secrets.AZURE_CERT_PROFILE_NAME }}
    azure-tenant-id: ${{ secrets.AZURE_TENANT_ID }}
    azure-client-id: ${{ secrets.AZURE_CLIENT_ID }}
    azure-client-secret: ${{ secrets.AZURE_CLIENT_SECRET }}

    # Sign all exes inside the folder
    files-folder: ${{ env.ARTIFACTS_PATH }}
    files-folder-filter: exe
This signs all exe files in the named directory. I opened an issue so we can just specify a single filename.
Success looks like this:
Submitting digest for signing...
OperationId 9823489-2398492348-2134234: InProgress
Signing completed with status 'Succeeded' in 2.9607421s
Successfully signed: D:\a\pamplejuce\pamplejuce\Builds\Pamplejuce_artefacts\Release\Pamplejuce Demo-0.0.1-Windows.exe
Number of files successfully Signed: 1
Number of warnings: 0
Number of errors: 0
Artifact Signing completed successfully
Maintaining and Renewing Identity Validation
In the old days, you would renew a certificate every year or two.
With Azure Artifact Signing, what you renew is two things:
- your Identity Validation
- your Client Secret
Microsoft will warn you by email when your Identity Validation is set to expire.
But the fact that the Client Secret expired took me by surprise until I saw it failing in CI:
ResponseBody: {“error”:”invalid_client”,”error_description”:”AADSTS7000222: The provided client secret keys for app ‘***’ are expired. Visit the Azure portal to create new keys for your app: https://aka.ms/NewClientSecret or consider using certificate credentials for added security: https://aka.ms/certCreds
Debugging
No certificates were found
The following certificates were considered:
Issued to: localhost
Issued by: localhost
Expires: Fri Apr 25 16:54:32 2025
SHA1 hash: SOMEHASH

After EKU filter, 0 certs were left.
After expiry filter, 0 certs were left.
SignTool Error: No certificates were found that met all the given criteria.
This means that the call out to Azure wasn’t invoked. There could be a couple reasons for this, double check the following:
- The
dllwasn’t found. The path should be exactly toAzure.CodeSigning.Dlib.dll(note that it’s notAzure.CodeSigning.dlland notAzure.CodeSigning.Dlib.Core.dll) - Make sure the
x64andx86situation is aligned. Both the dll and the signtool executable need to be using the same version. - Make sure you are on a recent enough version of signtool. As of April 2024, Microsoft support recommended
10.0.2261.755or later. - Make sure you are using the 64bit version of signtool and the Dlib and not the 32bit version.
- Watch out for the Developer Command Prompt!! Calling
signtoolfrom it can default to the 32-bit version of signtool (seriously, why is that a thing?) Supply the right path or use the x64 Native Tools Command Prompt.
Number of Errors: 1
Surely an award winning error message. Note this is with /v and /debug settings on, lol:
Number of files successfully Signed: 0
Number of warnings: 0
Number of errors: 1
I tried everything to resolve this one. In the end, the issue was the path to the thing I was signing was wrong! I was an idiot and trying to sign a folder (that for some reason was called MyPlugin.exe.)
403s when signing (or on GitHub Actions)
Azure.RequestFailedException: Service request failed.
Status: 403 (Forbidden)
...
Error information: "Error: SignerSign() failed." (-2147467259/0x80004005)
SignTool Error: An unexpected internal error has occurred.
This can mean one of two things:
signtoolis not seeing yourAZURE_CLIENT_IDand other credentials. Did you useset AZURE_CLIENT_ID=xyzto export them so signtool can “see” them?- You don’t have an
App Registrationuser. Go to Azure and check you have one, see step 4. - You App Registration user (client id/secret) doesn’t have the
Artifact Signing Certificate Profile Signerrole, see Step 5.
Original exception: AADSTS7000215
Original exception: AADSTS7000215: Invalid client secret provided. Ensure the secret being sent in the request is the client secret value, not the client secret ID, for a secret added to appThis means when you were in Azure and made the client secret for the App Registration user, you copied the secret id instead of the secret value.
You’ll have to go to App Registrations in Azure, find the one you created and add a new secret (since you can only grab the secret value upon creation).
SignTool Error: Missing filename.
This can happen if you are using variables in your call to signtool and they are not properly quoted. Make sure all paths with spaces in them are quoted. Make sure your variables don’t have newlines and are properly quoted.
Silent failures
Unfortunately there can be various silent failures from signtool. Check the following:
- You have at least .NET 6.0 installed, check with
dotnet --list-runtimes. - Make sure you are using a 64bit version of signtool unless you are a 32 bit system.
- If you run into anything else, please check out Event Viewer and comment below…
What to do if you can’t pass identity validation
- Try again.
- Submit different documents.
- Ensure company name is aligned in forms and documents.
- Check out this thread for some inspiration.
- Check out the JUCE forum thread for more edge case detail.
FAQ
Check out Microsoft’s Artifact Signing FAQ too…
Do I still need to buy a cert and put it into the account?
No. It’s all managed for you, by Azure. You just interact with their API via their tools. No more buying and juggling certs.
Do I keep a cert in “Azure Key Vault” or something?
Nope. Azure Key Vault is a different service, for the old school manual certs.
Can I use AzureSignTool?
Again, no. That’s for the old Azure Key Vault / manual certs.
Is this basically the modern equivalent to signing with an EV cert?
Yes. You get instant reputation.
This basically makes EV certs and OV certs legacy. You’ll get first-party (from Microsoft) reputation, tied to your identity validation there.
How does smartscreen reputation work? Will I get instant reputation?
Yes. Reputation now belongs to the code signing identity validation, no longer the individual certs (under the hood, the actual certs are rotated daily and are now an implementation detail as you never directly possess them).
Can I give my devs access to the account?
Yes, there’s full RBAC control. As far as I’m aware there’s no additional charge for additional accounts, etc.
Do I need to pay for that Azure “subscription”?
No, the azure “subscription” (see step 2) is a record/resource you need to setup so that Azure can bill you. It’s just bureaucratic b.s. needed for Big Enterprise. Just a hoop to jump through, no additional cost.
Why does my business need to be 3 years old?!
Apparently this has something to do with “Code Signing Baseline Requirements.
Microsoft is working on allowing anyone (“personal” or businesses with less years of tax history) to do signing by doing extra identity proofing. They hoped to have it out by General Availability. As of May 2025, this is “coming soon.”
I have also heard multiple accounts of people with less than 3 years of history passing validation. My advice would be to try it, but set expectations low.
Additional Resources
- KoalaDSP’s docs which include details on AAX support.
- Microsoft’s Artifact Signing docs.


Leave a Reply