
macOS code signing is something plugin devs tend to put off or avoid. But it’s fairly straightforward, especially when compared to Windows code signing (although that has improved lately too!)
Notarization in particular became much nicer (especially in CI) when notarytool was released at WWDC 2022.
altool was deprecated and unsupported after Fall 2023.
Let’s walk through the hows and whys — and get code signing and notarization running in CI.
Why code signing and notarization?
Code signing is you telling the user “hey, I made this and it hasn’t been modified since I made it.”
Notarization is Apple telling the user “we verify this dev made this, and we vouch there’s no malware in it.”
Why Bother?
I consider code signing audio plugins to be mandatory on macOS, even if you are just distributing to a handful of beta testers or friends.
You might be tempted to avoid it altogether. But this offloads inconvenience onto users less technical than yourself. And at the end of the day, it will still be you handholding them through approving your software (aka doing the system preferences dance), perhaps even having them run Terminal for the first time to try a killall -9 AudioComponentRegistrar without really knowing why, etc…
Adding this kind of friction to a customer’s first experience with your product isn’t worth it — even if it does save you a few hours. With a properly signed and notarized plugin, customers can start making music immediately — without engaging support articles or growing frustrated wrestling with technical hurdles.
Side note: In general, audio devs and their users can be superstitious and avoidant when it comes to staying up to date with the current (or gasp, the upcoming) macOS release. There’s a lot of history here… But fundamentally, the fact that we produce middleware puts us between a rock and a hard place — subject to both OS platform and DAW particularities. Notarization was a recent thorn in the audio industry’s side. Apple silicon support another. In both cases, larger audio companies took years to get up to date — at the cost of user experience and compatibility.
Interestingly, other industries don’t seem to struggle as much. Most non-audio indie macOS and iOS devs I know diligently test early OS betas and put the work in to make sure their users are all set by the time the public release is out. They accept that it’s part of the work you sign up for when publishing for the platform. It’s critical to their business…
Prereqs for Code Signing
First, make sure:
- You have an Apple developer account. It costs $99 a year (less than the Windows code signing options).
- You have Xcode downloaded and are logged in to your developer account.
- You have the Xcode developer tools installed. Run
xcode-select --installon the command line.
Pick a Cert
Ok, here’s the first gotcha people run into.
As a macOS developer, you can export different types of certificates for different purposes. So depending on what you are signing, you might need a different cert.
If you are distributing raw plugins (no installer), you’ll only need a Developer ID Application certificate.
If you want to create a “third party” installer (something that people download from your website), you’ll need a Developer ID Installer certificate.
To create an installer to distribute through the official Mac App Store, you’d use the Mac Installer Distribution Certificate.
Picking the wrong cert is one of the 2 things that trip people up (the other is what to sign/notarize, which we’ll get to).
Export the Cert
Let’s start with the simple plugin route. We’ll export the Developer ID Application cert from Xcode.
- Go into
Xcode > Settings > Accounts - Make sure you are logged in. If no user shows up in the sidebar, hit the
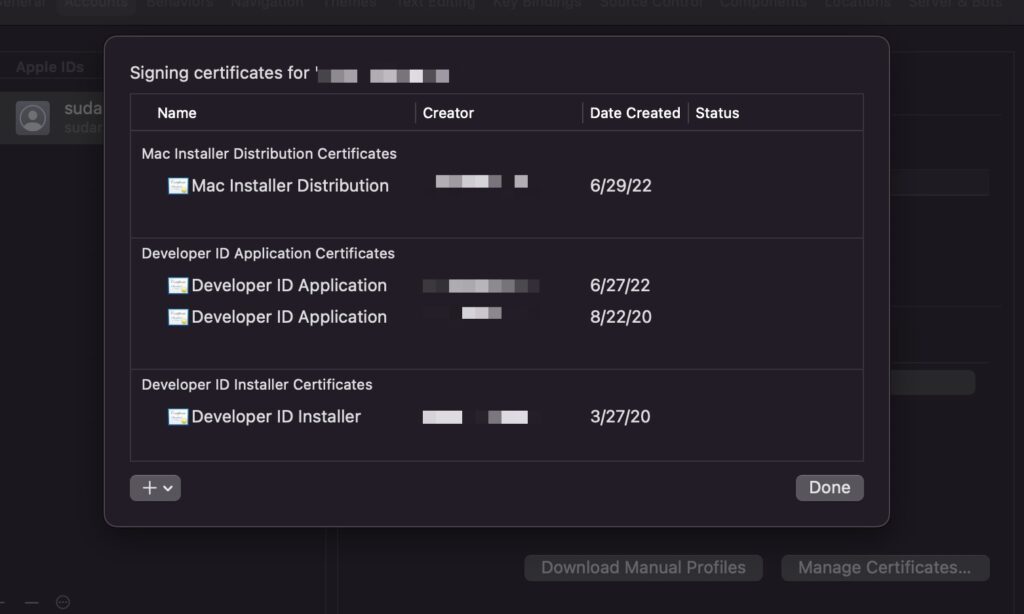
+to add your Apple ID. - Select your “Team” and click “Manage Certificates”.
- Hit the
+sign bottom left and create a newDeveloper ID Applicationcert — or use the existing entry if it’s already there. - Right click the “Developer ID Application” certificate and “Export Certificate”
- Choose a password. You’ll want to save this — you’ll need it each and every time you code sign. If you plan to code sign in CI, add it now as the
DEV_ID_APP_PASSWORDsecret.
If you plan on making an .pkg installer, repeat the above process with exporting a Developer ID Installer cert as well.
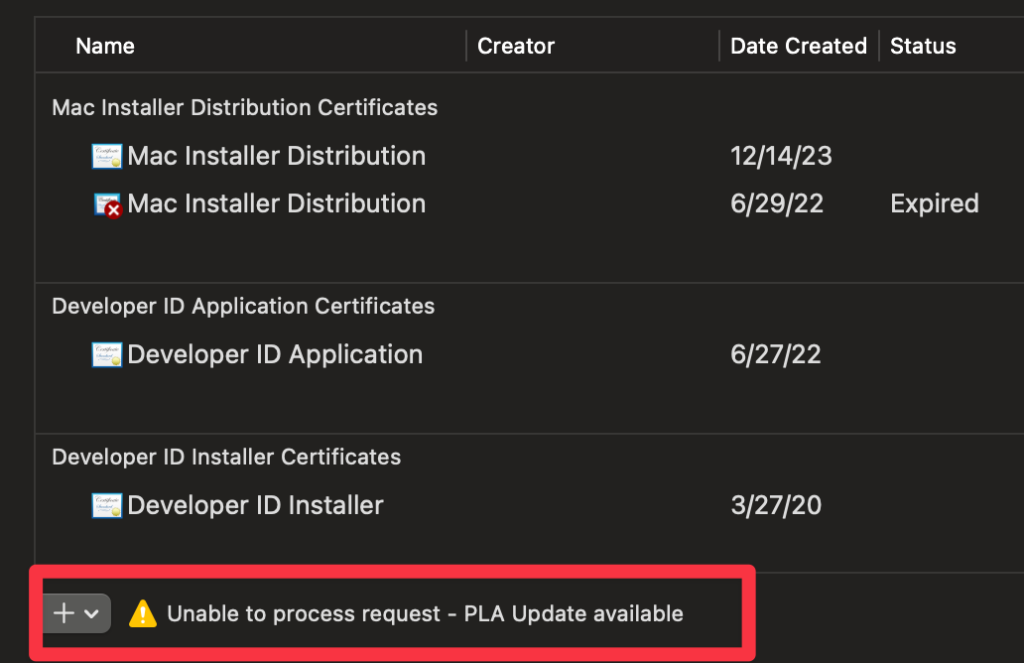
If the following warning shows up, you’ll need to log in and accept an agreement. You should see a notification after logging in. You’ll get used to doing this dance over the years.
Using the cert in CI
The downloaded .p12 file needs be base64 encoded to use it in CI.
You can do this in Terminal to copy the base64 encoded certificate to your clipboard:
base64 -i path/to/mycert.p12 | pbcopyPaste this base64 encoded string as the DEV_ID_APP_CERT secret in your CI.
See the GitHub Actions guide on secrets to get started if you haven’t done that before. Or just go to the repo’s Settings > Secrets and Variables > Actions > New Repository Secret.
Importing your cert in CI
First, run this locally to get a look at your identities:
security find-identity -vYou should get output like the following:
  1) 01ACFFAE427A61A108C40F29C494E6CEOBBAD86E3 "Developer ID Application: Your Name (2DO8NL92GO)"
     1 valid identity found
In this example, it is Developer ID Application: Your Name (2DO8NL92GO).
The entire string in quotes is the identity you’ll use when code signing.
You’ll need this while signing, so add it as the DEVELOPER_ID_APPLICATION secret in CI. Be sure that you don’t add or remove any spaces, it must be exactly the same string as the output (but without the quotes).
The string in parentheses is your Team ID. You’ll need it later for notarization. In this example it is 2DO8NL92GO. Add this as the CI secret TEAM_ID.
To get going in CI, you’ll need setup a keychain and import the cert during the CI run.
This GitHub action takes care of the process for you.
Note: you must specify a password for the keychain if you are signing both plugins and installers (and therefore want to run the import twice, once for a Developer ID Application, once for a Developer ID Installer).
Code signing in CI
Luckily code signing itself is super easy.
You need to code sign each binary.
So you would have one line for each AU/VST3/.app or whatever it is you are distributing.
Protip: you can also just try out code signing locally on any old .app or plugin from any other dev:
codesign --force -s "Developer ID Application: Your Name (2DO8NL92GO)" -v ~/Downloads/myApp.app --deep --strict --options=runtime --timestamp--options=runtime specifies you’d like a hardened runtime, necessary if you want to notarize (which you do).
Now verify that signing worked locally:
codesign -dv --verbose=4 ~/Downloads/myApp.appIn CI, you’ll use the DEVELOPER_ID_APPLICATION secret you added to sign your plugin, like so (again, using GitHub Actions as the example):
codesign --force -s "${{ secrets.DEVELOPER_ID_APPLICATION}}" -v ${{ env.ARTIFACT_PATH }}/myPlugin.component --deep --strict --options=runtime --timestampNotarizing
Here’s how it works:
- You put your plugin binary in a
dmg,ziporpkgcontainer - You upload it to Apple
- Apple verifies it’s not malware.
- When a user runs your software, it checks with apple to make sure the software is malware free.
If everything goes right, your users will see something like this:
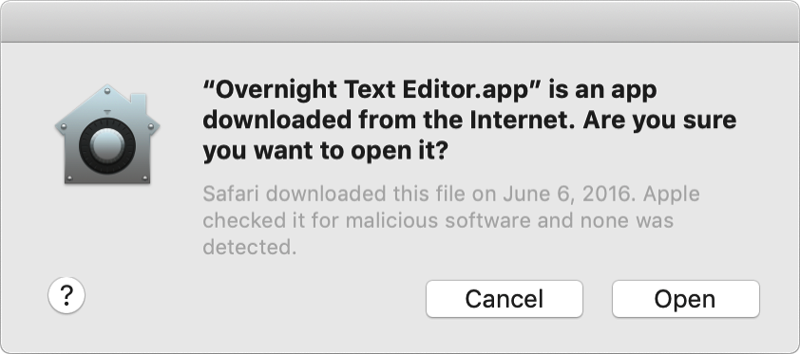
You’ll need to notarize each and every time you update the software, just like code signing. In other words — ideal to do in a CI pipeline.
Notary Tool
notarytool is a new tool as of WWDC 2022 that makes notarization easy. It’s also a one liner that looks like this:
xcrun notarytool submit myplugin.zip --apple-id you@email.com --password myPassword --team-id ABC123 --waitThe --wait argument is key in CI.
However, using your Apple ID password in GitHub Actions? Not what you want.
So you’ll probably want to setup an app-specific password by logging into appleid.apple.com and clicking App-Specific Passwords.
For pamplejuce, I added an NOTARIZATION_USERNAME (apple id) and NOTARIZATION_PASSWORD (the app-specific password).
Your app-specific password will invalidate when your main password is changed! Be warned, I just had to go change mine.
If you didn’t grab your TEAM_ID yet, run security find-identity -v -p codesigning. It can also be found in Apple’s member center under “Membership Details”.
What *exactly* to notarize?
This catches people out!
Rule #1 of notarization: Only notarize the outermost container — the zip, the pkg, the dmg.
Rule #2 of notarization: It needs to put in a container like that to even upload with notarytool. A raw plugin or app can’t be submitted.
Distributing a pkg or dmg? Notarize that!
If you are stubbornly distributing a raw .component or .app (vs. a dmg, pkg or zip) you would need to do a bit more work:
zipit- upload it to
notarytool - unzip it and staple the notarization to the
.componentor.app.
Staple
In addition to notarizing, you want to “staple” the notarization to the binary. This stamps the verified “proof” that you are malware free to the container you are distributing. When a binary is notarized and stapled, it instantly works offline for your users. (Otherwise, apple will verify the notarization online when the binary is first run by every user).
xcrun stapler staple yourApp.pkg # or yourApp.component/dmgYou can’t staple a .zip file. So if you want to distribute a loose .app or .component or two in a zip file, you’ll have to unzip, staple, and zip for distribution again.
A compromise to a full blown installer is a .dmg file, which you can create with one line:
hdiutil create -volname MyPlugin -srcfolder myArtifactsFolder MyPlugin.dmgVerifying Notarization
You can run the following to verify the app/component will run smoothly on people’s machines:
spctl -vvv --assess --type exec ~/Downloads/myApp.app Full CI example: GitHub Actions
A full working example of audio plugin signing in CI can be seen in Pamplejuce, my JUCE plugin template for GitHub Actions.
Note that at least 6 secrets are needed in total, as described throughout this post:
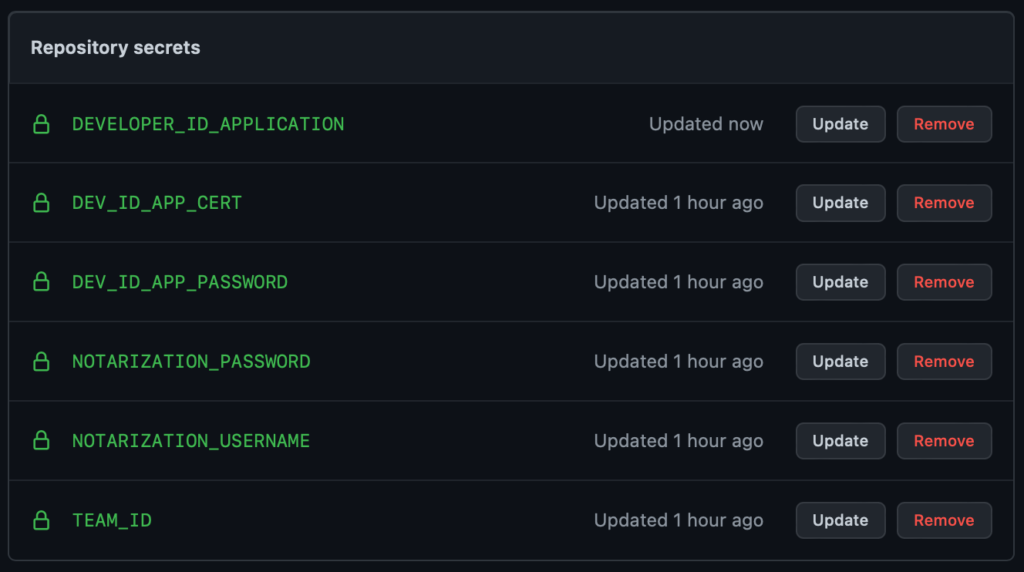
If you are creating a third party installer (vs. raw plugins), you’ll need to another cert and an additional 3 secrets: DEVELOPER_ID_INSTALLER, DEV_ID_INSTALLER_CERT, DEV_ID_INSTALLER_PASSWORD.
Pamplejuce currently produces a .pkg. This is the no brainer default, users are used to this. Creating .pkg installers on macOS is a different blog post (but yes, I wrote that one too).
In practice, Apple broke .dmg‘s usefulness for audio plugins when Gatekeeper and notarization was introduced. Users can no longer drag and drop to ~/Library or /Library symlinks in a dmg. I confirmed this with Apple themselves. (Update: it’s fixed again in Ventura 14.0 but I saw reports of it broken in 14.1)
Congrats!
You made it. That wasn’t too hard, was it? Well, perhaps there are a fair number of fiddly details. Hopefully most were covered here. If not, feel free to comment.
Troubleshooting Code Signing and notarytool Issues
Code sign: “error: The specified item could not be found in the keychain.”
This means you
- passed the wrong identity string to
codesignor - it doesn’t match the identity of the cert.
- Double check the secret you are passing to
codesign. - Repeat the certificate export step, making sure to pick the same identity you are using, re-exporting the cert with a password.
notarytool: “status: Invalid”
Thanks for the detail, Apple!
The error looks like this:
Current status: Invalid.............Processing complete
  id: 437befe-2e52-401f-b17a-91b2de977cb5
  status: Invalid
To check for detail, query notarytool with the id:
xcrun notarytool log 437befe-2e52-401f-b17a-91b2de977cb5 --keychain-profile you@email.com log.jsonOpen up your log.json gift from Apple, to discover how you messed up:
"issues": [
    {
      "severity": "error",
      "code": null,
      "path": "Pamplejuce.dmg/libPamplejuce_SharedCode.a",
      "message": "The binary is not signed.",
      "docUrl": null,
      "architecture": null
    },
    {
      "severity": "error",
      "code": null,
      "path": "Pamplejuce.dmg/libPamplejuce_SharedCode.a",
      "message": "The signature does not include a secure timestamp.",
      "docUrl": null,
      "architecture": null
    }
  ]
In the above example I was accidentally including libPamplejuce_SharedCode.a in the dmg (and it wasn’t code signed).
“You can’t open the application because it may be damaged or incomplete”
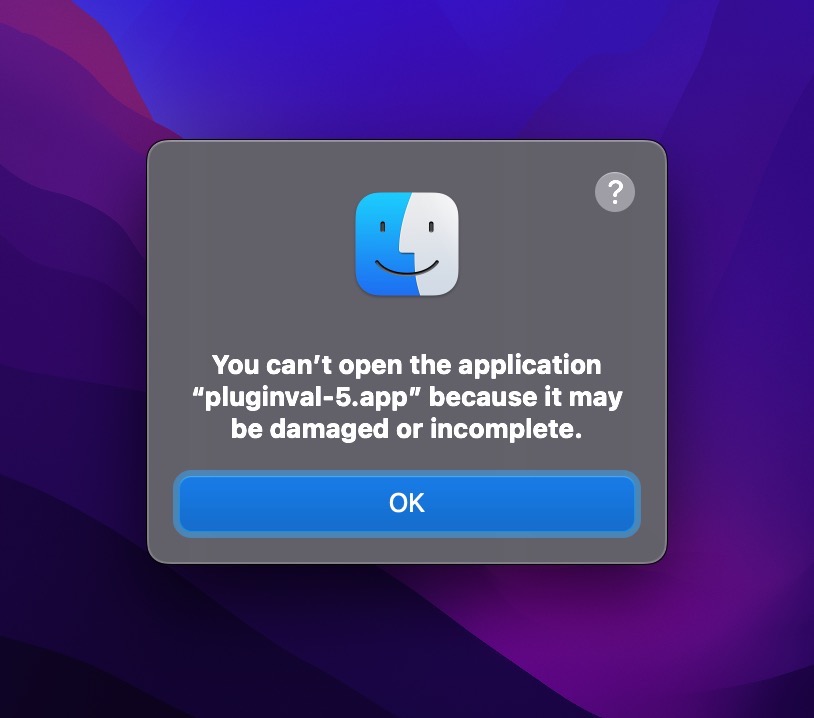
This can happen if you
- Accidentally code signed the binary inside the
.appbundle (for exampleMyApp.app/Contents/MacOS/myApp) and not the.appbundle itself - The
Info.plistis missing inside the bundle, or some some modification was made to the bundle’s contents after signing.
See a bit more detail with:
> codesign --verify -v myApp.app
myApp.app: invalid Info.plist (plist or signature have been modified)
Notarization just stops working, or fails with Error 1048
One of most common and frustrating notarization problems, isn’t listed on Apple’s “Resolving common notarization problems“
If you are seeing Error 1048, you may have to login to apple’s developer portal and sign developer agreements. This may happen periodically over the years, so be prepared!!!
Error: HTTP status code: 403.
Invalid or inaccessible developer team ID for the provided Apple ID. Ensure the Team ID is correct and that you are a member of that team.
This can mean your apple developer subscription expired and you didn’t renew it.
Developer ID Application ambiguous (matches “Developer ID Application…’
You might get this when code signing. This just means you have more than 1 certificate with the same name and it doesn’t know which to use.
Unfortunately, there’s no way to remove certificates in Xcode.
You can, however, delete the extra certificate from the login keychain. Be careful around this stuff!

Keychain Access and go to login > My CertificatesYou can also specify the exact certificate hash instead of the name.
Run security find-identity -v -p codesigning and take note of the hash and use this as your DEVELOPER_ID_APPLICATION secret, passing it to the -s option when running codesign

Leave a Reply